


In this guide, we will go through the steps on how to adjust your Holosun Red Dot.
There are two critical adjustments to be made on all Holosun Red Dots.
The first is adjusting the position of the dot to match the point of bullet impact (zeroing). The second is adjusting the brightness of the dot so that it is easy to see.
How to Adjust the Dot Position (zeroing)
Before you zero your Holosun red dot, make sure it is mounted correctly. We recommend torquing the screws to 15 in-lbs.
This is an important step, since too little torque can allow the screws to come loose. Too much torque can also cause problems. Over torquing can cause the screw holes in your pistol slide to strip out, allowing the screws to come loose as well.
In addition to torquing the screws to the proper torque, also use some type of non-permanent thread locker (Loc-tite or Vibra-tite).
When checking the zero of your red dot, fire a 3 to 5 shot group at a target about 10 yards away.
Holosun red dots have two zero adjustments. Windage, or left and right adjustment, and Elevation, or up and down adjustment.
After shooting a grouping, roughly measure how far away the center of the grouping is to the center of the target (the point of aim).
To move the point of impact left or right, turn the windage adjustment in the direction that you want to move. The picture below shows the windage adjustment on two popular Holosun red dots.
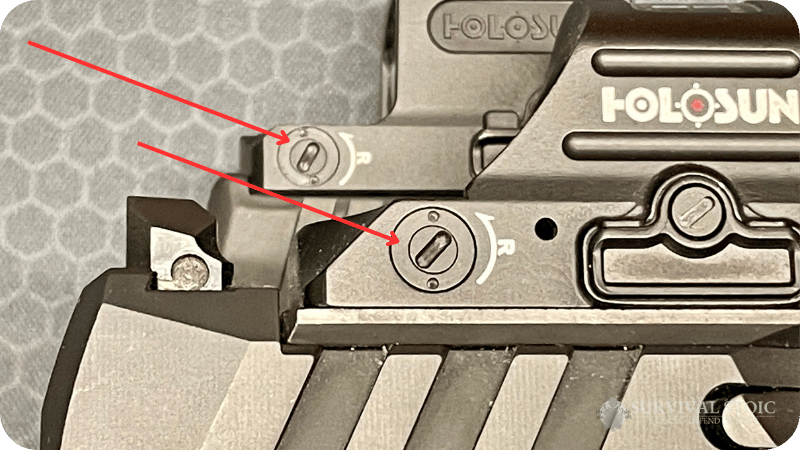
Similarly, to move the point of impact up or down, turn the elevation adjustment in the direction that you want to move. The picture below shows the elevation adjustment on two popular Holosun red dots.
Each click of the adjustment screw is 1 MOA. This means that each click will move the point of impact 1 inch at 100 yards. At 10 yards, 10 clicks will move the point of impact 1 inch.
As an example, consider that you want to move the point of impact 1 inch to the right and 2 inches up. You would move the windage adjustment 10 clicks in the right direction as indicated by the arrow. Then, you would move the elevation adjustment 20 clicks in the up direction.
This process can be repeated until the point of impact is in the center of the target.
Considerations when Zeroing
Keep in mind that shooting a pistol accurately beyond a few yards is a challenge. It is much different than shooting a rifle. Even the most skilled pistol shooters have a hard time holding a tight group consistently beyond 10 yards.
If possible, use a rest when shooting your pistol while zeroing. This will help make the shots more accurate. Rest your forearms on a table while seated for example.
Even while using a rest, some shots could be inaccurate due to recoil anticipation. If you find that your shots are not consistent and it seems that your dot won’t hold a zero, it could be because you are moving the pistol as you are pulling the trigger.
How to Adjust the Dot Brightness
For Holosun red dots with Solar Fail-Safe solar panels, there are three brightness modes. Auto, Manual, and Lockout.
For Holosun red dots without Solar Fail-Safe solar panels, there are two modes, Manual and Lockout.
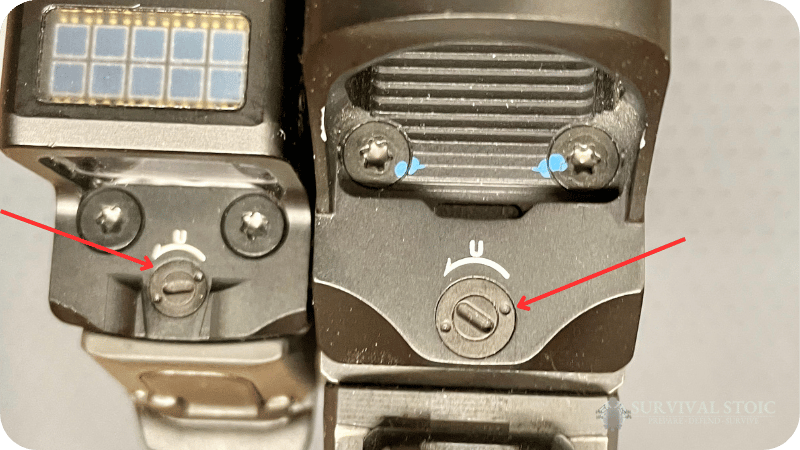
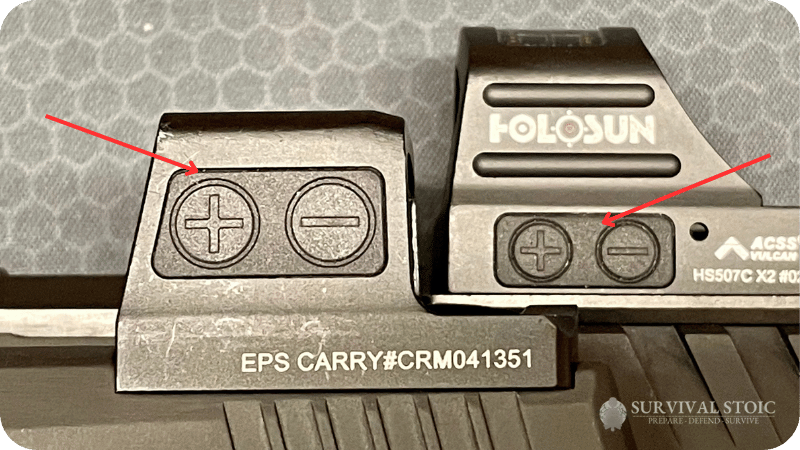
The brightness modes and levels are controlled by the “+” and “-“ buttons on the side of the red dot. The picture below shows the buttons on two popular Holosun red dots.
The brightness modes are sequentially cycled through by pressing and holding the “+” button.
Auto Mode
Auto mode is the default setting for Solar Fail-Safe models. This is the mode the red dot will be in when it is first powered up.
In Auto mode, the red dot automatically changes the brightness depending on the ambient light conditions.
In low light conditions, the dot brightness can be changed by pressing the “+” and “-“ buttons.
Manual Mode
To switch to manual mode, hold the “+” button for about 3 seconds. The reticle will blink once to confirm the mode change.
In Manual mode, the user can adjust the dot brightness with the “+” and “-“ buttons regardless of the ambient light conditions.
Manual mode is the default mode for non-Solar Fail Safe models.
Lockout Mode
To switch to lockout mode, hold the “+” button for about 3 seconds. The reticle will blink once to confirm the mode change.
In lockout mode, the reticle brightness is locked to the current setting and can not be changed with the “+” and “-“ buttons. To return to Auto mode, press and hold the “+” button for 3 seconds again.
Learn More
For more tips on how to get the most out of your firearm optics, be sure to check out the other articles on our Blog.